Welcome to our little bit of knitterly Heaven- I'm so glad you found your way here!
Our goal is to teach beginning knitters some tricks of the trade as well as to work enough swatches to have a finished afghan by the end of the year! Join along with us as we learn about patterns, cables, lace, and some other handy techniques! A new pattern will become available each month ranging from newbie to adventurous. So stop on by, pick your pattern and knit along with us!

All patterns can be found here as well as on Ravelry.com!
Showing posts with label Just for Fun. Show all posts

Thursday, January 9, 2014

where has the time gone?

Hello Friends. 

It has been quite a while since I've written.  It seems that I've started this post a hundred times, but can't get past this point.  We'll just say, life got busy and writing wasn't a priority. 

I'd like 2014 to be different.  Since the 'New Year' is a time for resolutions, here's mine: I resolve to write more often.  I'd like to share more of the personal things I've been working on as well as a couple of new designs.  I also have another series of knitted squares for this year- the set up will be a bit different from the squares in the past.    

I hope you can forgive my silence over the last 9 (or so months) and that you would join me for renewed knitting in 2014, I would be honored!

Friday, February 8, 2013

Fragments Clue 18- Blocking

Hiya Knitters!  How did the grafting go?  How awesome is this baby!

Today we are going to talk about blocking your scarf.  The particular method we'll be using today is called wet-blocking.  Blocking is essential when it comes to knitting, because it takes your knitting from just "being done" to looking complete.  Always wonder how those patterns on Ravelry look so amazing?  It's all to do with blocking (that and professional lighting and photography).  And as far as techniques go, this is pretty darn easy (although a bit time consuming).  

TOOLS:
-Lots of Quilting pins (I used about 120 for mine)
-A clean sink and cool fresh water
-A couple of clean, dry bath towels
-A place to pin where your knitting can be left undisturbed for up to 24 hours (more on this below)
-Optional: A helper- if you have (and can trust) one with the work.  I've taught my husband how to pin, so I usually enlist his help on some of my larger projects.

GIVE IT A SOAK
After you've sewn in all your yarn ends, fill a clean sink or tub with some cool fresh water.  Temperature is important!  Especially if you are working with wool.  If your water is too warm or hot, you can end up felting your work- and that would be horrible after all that hard work!  Two things cause felting: warm water and agitation.  And in its wet state, yarn is incredibly delicate.
Set your scarf in to soak.  Do not agitate or wring your scarf (again, delicate).  Let your scarf soak for about 30 minutes so you can be sure that the yarn is fully saturated.  You can gently move your scarf a bit to make sure that there aren't any air pockets.

PRESS IT OUT
After the 30 minutes is up, drain the water and gently press the scarf against the side of your sink/tub to remove the excess water.  Lay your bath towel(s) flat and place the scarf on top of it (my scarf was so long that I needed two towels slightly overlapping).  Go ahead and stretch out your scarf as you would like it to look like when finished.  


Roll up in the towel with the scarf inside. 

Now you can get a little rough (still no wringing though)... using your body weight press on the towel to remove the rest of the water (I do this by walking up and down on the towel).  The towel along with the pressure will wick the water out of your scarf.  When you unroll your scarf, if it is still excessively wet, you can repeat the process with another dry towel.
Now that your scarf is more or less dry (it will feel damp to the touch), you can start pinning it out.  You'll need a surface to pin your work on in a place that won't be disturbed for at least 24 hours.  A foam mat, a spare mattress, and even a carpeted floor work just fine.  I usually pin my knitting right onto the carpet in my closet or spare room where I can shut the door and let the piece dry in peace (haha). 
This is the time to stretch and form your knitting to look exactly like you want it.  Smooth any wrinkles and make the knitting taut, then pin it in place.  I like to start in the middle and work my way to each end setting the pins about an inch or so apart.  You can get pretty aggressive with your stretching at this point.  This process will really make your stitch definition pop!  And don't worry if you find yourself needing to re-pin sections as you go. 
Make sure your edges are as straight as possible and that you get that lace to wave at the ends. 
Once you are pleased with the pinning, allow your piece to air dry until it is completely dry.  Dry time will vary depending on how wet your piece was when you started pinning. 

I will post a final round of pictures as well as a short survey about the scarf either later today or tomorrow.  Here's a head's up on the survey... I'd like you to let me know what your four favorite fragments are.  The top four will end up being swatches for this year.

Well, I hope you had fun with this- I certainly did!  I am so honored that you chose to knit-a-long with me and I hope you enjoy your Fragments Scarf!

Happy Knitting!
PS- Kitties are cute, but they aren't very good at pinning!

Thursday, February 7, 2013

Fragments Clue 17- Grafting

Hi Friends!  We've made it!  Can you believe nearly a month ago, we started this journey together?  I am so glad that you joined me to knit along!  

Today is the first of our two finishing clues.  We will start by grafting the two pieces together using a technique called Kitchener stitch.

Grafting is a handy task to learn because it allows you to join two pieces of work, seamlessly, while the stitches are still "live’’ rather than after they have been bound off.  Grafting can be done either with stockinette or garter stitches and the technique is different for both.  The tutorial I like to use can be found here.  The illustrations in this article are for stockinette stitch, and since we are going to be grafting in garter stitch, I have made a photo tutorial for you to follow. 

If you are grafting for the first time, or need a refresher, PLEASE do this during a quiet moment when you will be most likely to finish it in one sitting without interruption (the process shouldn’t take you any longer than 30 minutes if it’s your first time).  The worst thing would be for you to set it down and not remember where you are when you pick it back up.  The first couple of stitches in this grafting sequence will seem a little strange at first, but there is a rhythm to it that you’ll soon pick up.

I’ve done both a photo tutorial as well as an abbreviated written version to follow.  When I graft, I like to look at the pictures first to orient myself, but find that the words carry me through once I’ve started.  
For this project, and really any time you’re grafting, you want your graft to match the tension of your knitting.  It’s kinda like Goldilocks, you don’t want it too loose nor too tight, but just right.  I’ve found that if your grafting is too loose it is way easier to fix than if it is too tight, however the best option would to get it to be as close as possible.  How do you achieve this?  Look at your knitting as you go.  Grafting is seamless , so your graft should look exactly like your knitting.  You don’t want the graft to pucker in (too tight) or out (too loose) so keep an eye out.  I recommend pulling the stitches through until they meet, but not so they are snug. 

After you graft the piece together, there will be another post on how to block your work as well as some follow up info.  Take your time and enjoy the process!

THINGS YOU'LL NEED

Take the tail of yarn from the second half of your scarf and cut a length at least three times the length of your knitting (3-4 feet of yarn should do).

A darning needle or other large eyed needle.  The same as you’d use for sewing in ends. 

PREPARE FOR THE GRAFTING!
Thread stitches from stitch holder onto your spare needle with the working yarn facing in- toward the inside of the needle (yup- opposite of what you'd normally do).  This will be your back needle. 

Thread your darning needle with tail of the front needle

Hold the two halves of your scarf wrong sides together with the tips of the needles pointing to the right.

Insert the darning needle into the first stitch on the front needle as if to purl and thread the yarn through.   
Then, insert the needle into the first stitch of the back needle as if to purl and pull the yarn through.  Make the stitches snug but NOT tight. Take care not to ‘’create’’ extra loops by looping the yarn over the needles.  

KITCHENER STITCH:
1- FRONT NEEDLE: Insert the needle into the first stitch on the front needle as if to knit and slip that stitch off the needle.

2- FRONT NEEDLE: Insert the needle into the next stitch on the front needle as if to purl, pull the yarn through but leave the stitch on the needle.

3- BACK NEEDLE: Insert the needle into the first stitch on the back needle as if to knit and slip that stitch off the needle.

4- BACK NEEDLE: Insert the needle into the next stitch on the back needle as if to purl, pull the yarn through but leave the stitch on the needle.

Repeat these four steps until you come to the final stitch on each needle.  Thread the needle through the front stitch as if to knit and slip it off the needle.  Then thread the needle through the stitch on the back needle as if to knit and slip it off the needle. 

To correct a graft that is too tight:
Tug the two sides of your knitting away from each other.
 To correct a graft that is too loose:
Tug the end of your sewing yarn to tighten.
 You can manipulate that thread until your sewing looks right. 

Sew in all ends. 

Abbreviated Instructions:
1.       FRONT NEEDLE: Knit and slip off the needle
2.       FRONT NEEDLE: Purl and leave on the needle
3.       BACK NEEDLE: Knit and slip off the needle
4.       BACK NEEDLE: Purl and leave on the needle

I hope your grafting goes well.  See you tomorrow for blocking!

Wednesday, February 6, 2013

Fragments Clue 16

Hi there and welcome to the Final Knitting Clue for our Fragments KAL!  This last 'fragment' is really kinda cute and one of my favorites! Enjoy!

Pattern Notes:
This pattern is knit over 47 stitches- don't count your stitches after rows 5 or 11 (they won't add up!)

[K1, P1, K1, P1 all into the same stitch] This is an increase (making four stitches out of one) and is knit just like it sounds.  Knit, purl, knit, and purl into the stitch without slipping it off the needle.  This is knit the same way we did our little flame stitch from last week (you can also take a look at the bobble tutorial I posted a couple of years ago).  Take a deep breath- you can do it!

[sl-3, K1, pss3o]- Slip 3 stitches to the right hand needle. Bring the yarn between the needles towards the back as if to knit, K1. Move yarn back between the needles to the front as if to purl and pass each slipped stitch over the knitted stitch and off the needle (keep the knitted stitch on the needle)

Row 1: Knit across row
Row 2: K3 *purl across* K3
Row 3: Knit across row
Row 4: K3 *purl across* K3
Row 5: K8 *[K1, P1, K1, P1 into the next stitch], K5* K3
Row 6: K3, P5 *[sl-3, K1, pss3o], P5* K3
Row 7: Knit across row
Row 8: K3 *purl across* K3
Row 9: Knit across row
Row 10: K3 *purl across* K3
Row 11: K5 *[K1, P1, K1, P1 into the next stitch], K5* to last 6 sts [K1, P1, K1, P1 into next stitch], K5
Row 12: K3, P2 *[sl-3, K1, pss3o], P5* to last 9 sts [sl-3, K1, pss3o], P2, K3

Knit through the pattern rows completely and then repeat rows 1-9 again (21 rows).

Knit 1 row. 

Congrats!  The knitting portion of our KAL is complete- now we just need to put it all together!
Tomorrow there will be a long winded post on how to join the two halves together and Friday will have a post on how to block your scarf. 

Happy Knitting!

Tuesday, February 5, 2013

Fragments Clue 15

Hey Knitters! 
Today's clue is relatively easy compared to the last couple of ones, but keep an eye open- there's lots of knits and purls! 

Row 1: K3, P1 *K1, P1, K2, P1, K2, P1, K1, P1* K3
Row 2: K4* P2, K1, P1, K1, P1, K1, P2, K1 *K3
Row 3: K3, P1 *K3, P3, K3, P1* K3
Row 4: K5 *P3, K1, P3, K3* repeat to the last 12sts P3, K1, P3, K5

Repeat these rows for a total of 5 times, then repeat rows 1-3 again.

Knit 3 rows.

See you tomorrow and Happy Knitting!

Monday, February 4, 2013

Fragments Clue 14

Hi Friends- how was your weekend?  More importantly, how is the knitting?  I hope everything has gone well!
We are now in our final week of our KAL- wow has it has gone fast or what!

Pattern Notes:
sl-3 wyf: Move the yarn forward between the needles and slip the next 3 stitches to the right hand needle, move the yarn back and continue in pattern.  This will occur on the right-hand (front) side of your work.
sl-3 wyb: Move the yarn between the needles to the back side of your work and slip the next 3 stitches to the right hand needle, move the yarn forward again and continue in pattern.   This will occur on the wrong-hand (back) side of your work.

Row 1: K4 *K1, sl-3 wyf, K4* K4
Row 2: K4 *P4, sl-3 wyb, P1* K4
Row 3: K4 *K1, sl-3 wyf, K4* K4
Row 4: K4 *purl* K4
Row 5: K4 *K5, sl-3 wyf* K4
Row 6: K4 *sl-3 wyb, P5* K4
Row 7: K4 *K5, sl-3 wyf* K4
Row 8: K4 *purl* K4

Repeat these eight rows twice and then rows 1-7 again.

Knit 3 Rows.
During the final row k2tog once to prepare for the final row (47sts).


See ya tomorrow and Happy Knitting!

Friday, February 1, 2013

Fragments Week 3

More Eye Candy!
~Enjoy~

Have a lovely weekend!

Fragments Clue 13

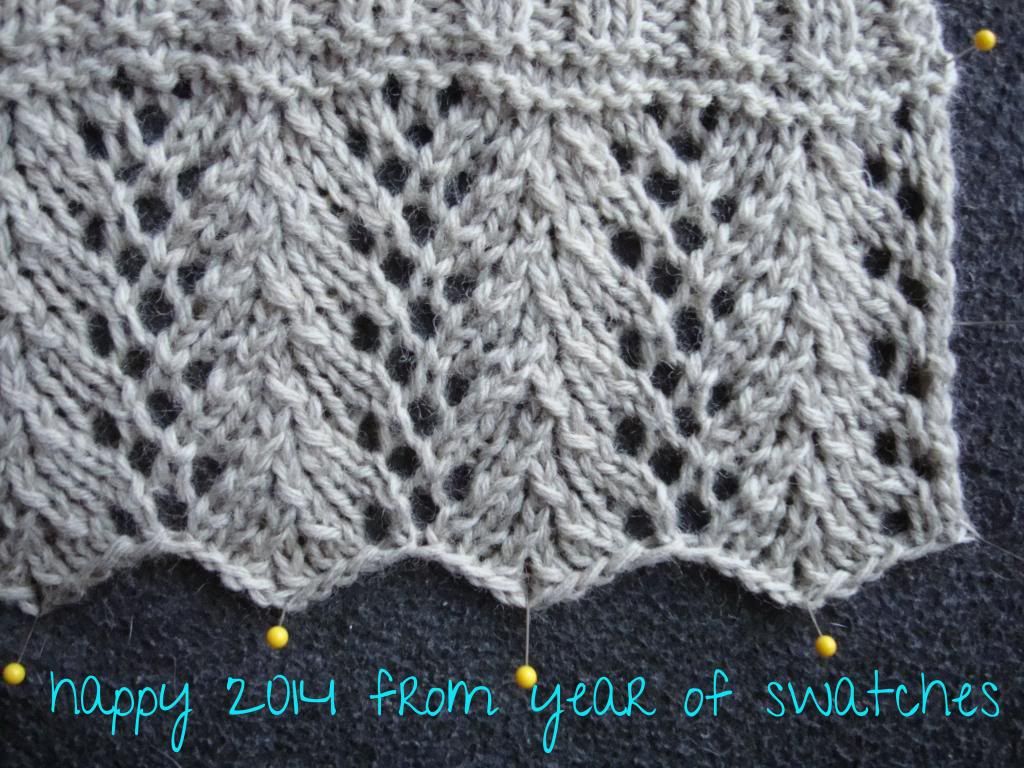
Hey Knitters, how's the KAL going?  Three weeks down, we've only got a few clues left!

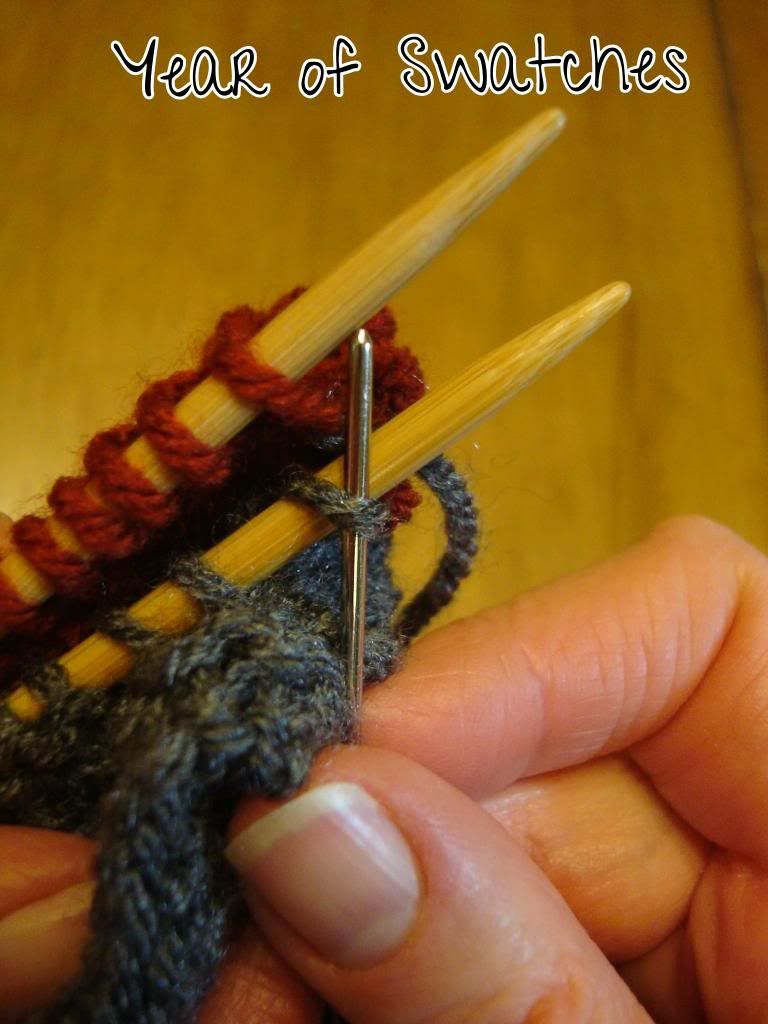
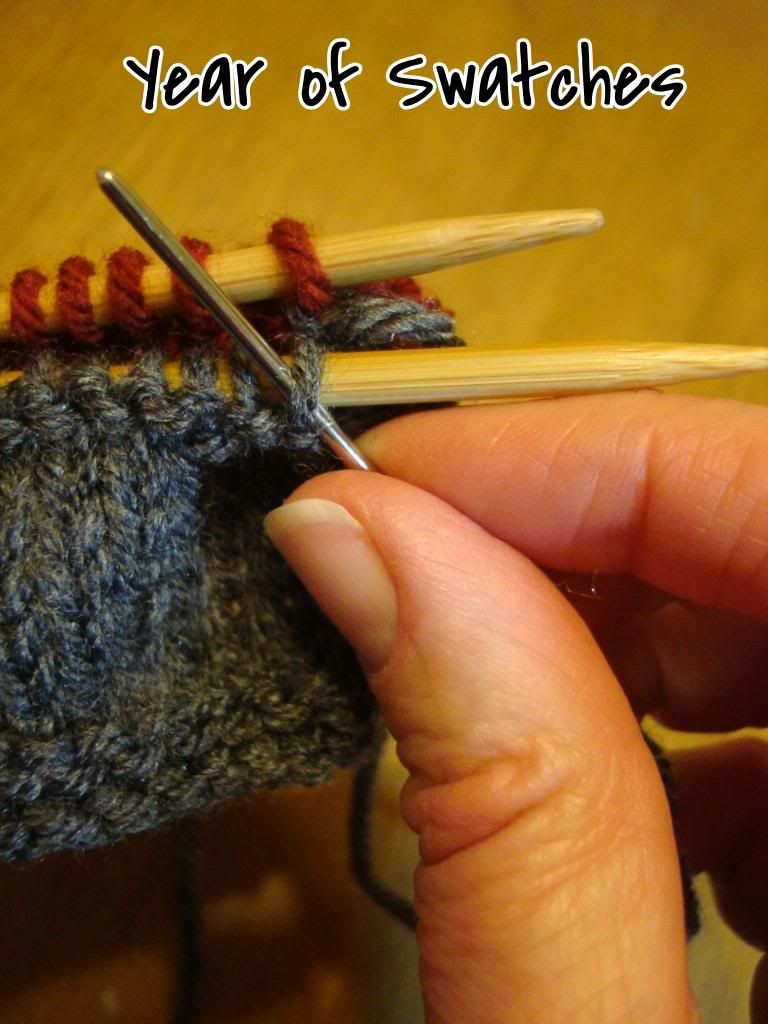
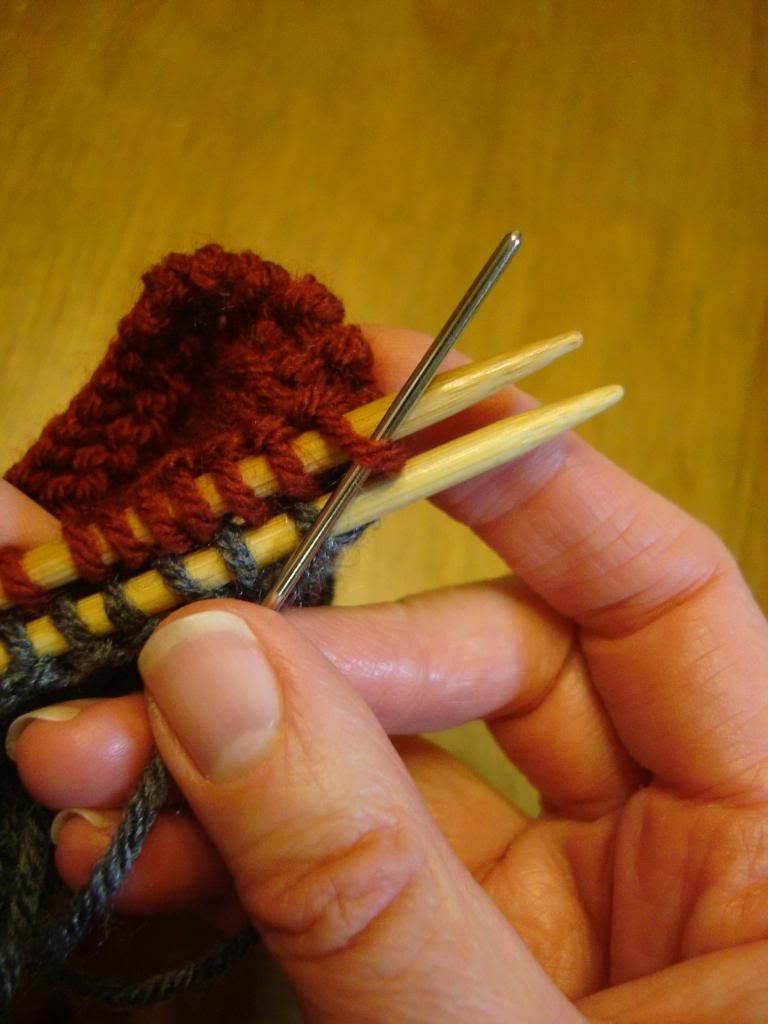
So, if you didn't see the update from yesterday... there was a tiny mistake in Clue 12.  At the end of the clue when you’re knitting your three border rows, you don’t need to increase any stitches in this section. Clue 13 will have 48 sts just like Clue 12.  If you've already finished this clue, just knit back the last row and take out the increase.  I have updated the pattern, so if you've copied/printed/already knit that clue you'll need to make that update.  I am sorry for any inconvenience!


KEY:
yo:  yarn over- A single increase.  Move the yarn to the front of the work, the same action as if you were to purl, then wrap the yarn over the top of the needle and resume your knitting.  This creates a hole or an eyelet in the fabric.

k2tog: knit 2 stitches together- A right-slanting decrease.  Insert the needle into the next two stitches as if to knit, and knit these stitches together. 

skp- slip 1 stitch knitwise, knit the next stitch and pass the slipped stitch over the knitted stitch and off the needle.  This is a left-slanting decrease.

Pattern:
Row 1: K3 *P6, K3* across the row
Row 2: K7 *K2tog, P3, K1, yo, K3* repeat to the last 5sts K5
Row 3: K3, P7 *K3, P6* repeat to the last 11sts K3, P5, K3
Row 4: K6 *K2tog, P3, K1, yo, K3* repeat to the last 6sts K6
Row 5: K3, P8 *K3, P6* repeat to the last 10sts K3, P4, K3
Row 6: K5 *K2tog, P3, K1, yo, K3* repeat to the last 7sts, K7
Row 7: K3, P9 *K3, P6* repeat to the last 9sts K3, P3, K3
Row 8: K4 *K2tog, P3, K1, yo, K3* repeat to the last 8sts, K8
Row 9: K3, P10 *K3, P6* repeat to the last 8sts, K3, P2, K3
Row 10: K3 *K2tog, P3, K1, yo, K3* repeat to the last 9sts, K9
Row 11: K3 *P6, K3* across the row
Row 12: K8 *yo, K1, P3, skp, K3* repeat to the last 4sts, K4
Row 13: K3 P5 *K3, P6* repeat to the last 4sts, P1, K3
Row 14: K9 *yo, K1, P3, skp, K3* repeat to the last 3sts K3
Row 15: K3, P4 *K3, P6* repeat to the last 5sts, P2, K3
Row 16: K10 *yo, K1, P3, skp, K3* repeat to the last 11sts, yo, K1, P3, skp, k5
Row 17: K3, P3 *K3, P6* repeat to the last 6sts P3, K3
Row 18: K11 *yo, K1, P3, skp, K3* repeat to the last 10sts, yo, K1, P3, skp, K4
Row 19: K3, P2 *K3, P6* repeat to the last 7sts P4, K3

Knit 3 rows.

Have a nice weekend and happy knitting!

Thursday, January 31, 2013

Fragments Clue 12

Hey there friends!  I hope the knitting is going well for you.
This Clue has a little bit of cabling in it.  No pictures this time, but if you need a little help you can check out Clue 7

Pattern Notes:
C3L: Slip one stitch onto the cable needle and hold the needle to the front of your work.  Knit two stitches from the left needle and then the one from the cable needle.
C3R: Slip two stitches onto the cable needle and hold to the back of your work.  Knit one stitch from the left needle and then the two from the cable needle.

Row 1: K3 *K1, sl-1, K4, sl-1*  K3
Row 2: K2, P1 *sl-1, P4, sl-1, P1* K3
Row 3: K3*K1, sl-1, K4, sl-1* K3
Row 4: K2, P1 *sl-1, P4, sl-1, P1* K3
Row 5: K3 *K1, C3L, C3R* K3
Row 6: K2 *Purl* K3

Repeat these rows for a total of three times then repeat rows 1-5 again.

Knit three rows. During the last row increase once (49 stitches).
Update: DO NOT INCREASE DURING THE LAST ROW (48 sts).


Enjoy and Happy Knitting!

Wednesday, January 30, 2013

Fragments Clue 11

Hey Knitters- how did the flame stitch go?  It's a little complicated to start out, but I felt it got easier as I went along.  Today's Clue is really simple, to give you a little break.  Enjoy!


Row 1: K2 *K6, P3, K2* K2
Row 2: K2 *P2, K3, P6* K2
Row 3: K2 *K2, P3, K6* K2
Row 4: K2 *P6, K3, P2* K2

Repeat these pattern rows for a total of five times (20 rows).

Knit four rows.

See you tomorrow, and happy knitting!

Tuesday, January 29, 2013

Fragments Clue 10

Hi Friends- how did lace knitting 2.0 go?  I hope it was easier this time :)

Today's clue has a double increase (increase twice into the same stitch) and then a double decrease (decrease two stitches at once) that you may not have knit before.  There's a bunch of pictures to help you through it.

[K1, yo, K1 into the same stitch]
Knit one stitch and don't slip it off the needle...
Yarn over the needle and don't slip it off the needle...
Knit again into the same stitch. Remove it from the needle.

You've just turned one stitch into three (increased two stitches).
 
P3tog
Slip your right hand needle into the next 3 stitches
Purl them together!
All Done :)
You've just decreased two stitches (gone from three to one stitch).

Pattern Notes:
If it helps to know...
You'll start this pattern with 48 stitches.  Rows 1, 2, 6, 7, 8, 12 will have 48 sts.
In rows 3, 4, 5 you will be increasing 14 stitches (two per pattern repeat) to 62 sts.
In rows 9, 10, 11 will be increasing 12 (also two per pattern repeat) to 60 sts.

Row 1: K3 *purl across* K3
Row 2: Knit
Row 3: K3 * P3, [K1, yo, K1 into the same stitch], P2* repeat from * across to the last 3sts K3
Row 4: K3 *K2, P3, K3* repeat from * across to the last 3sts K3
Row 5: K3 *P3, K3, P2* repeat from * across to the last 3sts K3
Row 6: K3 *K2, P3tog, K3* repeat from * across to the last 3sts K3
Row 7: K3 *Purl across* K3
Row 8: Knit
Row 9: K3, P1* P5, [K1, yo, K1 into the same stitch]* repeat from * across to last 8sts P5, K3
Row 10: K3 *K5, P3* repeat from * across to the last 9sts K9
Row 11: K3, P1 *P5, K3* repeat to the end of the row
Row 12: K8* P3tog, K5* repeat to the last 4sts K4

Knit the pattern rows 1-12 and then repeat rows 1-7 (19 rows).

Knit 3 rows

Good luck, be patient, and have fun!
~Happy Knitting~

Monday, January 28, 2013

Fragments Clue 9

Hello Knitters and welcome back!  I hope you had a nice and relaxing weekend.

So, what do you think so far- not too bad, eh?  We've officially made it through the first half of our KAL and today we are starting the second half!

I've heard that some of you had problems getting going with the first clue- throwing lace at you right off the bat was a bit intimidating.  Well, I've got some great news!  You'll get some more practice with it!  Yup that's right, we are going to be casting on the second half of the scarf and repeating Clue 1 again!  YEA (don't groan- celebrate it!)!

Since our scarf is knit in two halves, we will be joining it in the middle by grafting the two pieces together.  Don't worry, I'll walk you through the process and you'll have learned something new :)

So, on to the knitting!

Cast on 49 stitches using your most comfortable cast on (I prefer either the long tail or knitted cast on- a photo tutorial for both can be found here).

Row 1: Purl all stitches
Row 2: K3 *yo, K2, ssk, k2tog, K2, yo, K1* repeat from * across to last stitch K1
Row 3: Purl all stitches
Row 4: K2 * yo, K2, ssk, k2tog, K2, yo, K1* repeat from * across to last two stitches K2

Knit these 4 pattern rows for a total of 5 times.

Knit 3 rows. During the final row, k2tog once near the middle of the row (exact placement is not important) in preparation for the next clue.  You should now have 48 stitches.

See ya tomorrow, and remember- have fun!

Friday, January 25, 2013

Eye Candy

Here's some eye candy to get you through the weekend!
~See you Monday~


Fragments Clue 8

Hey there!
How did the cables go?  Well, I hope.  I bet you've figured out what we're doing by now...
Plus today is the half way point!  We'll have nine more clues over the course of the next two weeks plus some finishing work and then we're done!   

Row 1: K3, P1 *K7, P1* K3
Row 2: K5, P5 *K3, P5* to last 5 sts K5
Row 3: K4 *P2, K3, P2, K1* K3
Row 4: K3, P2, K2, P1, K2 *P3, K2, P1, K2* to last 5 sts P2, K3
Row 5: K6, P3 *K5, P3* to last 6 st K6
Row 6: K3, P4, K1 *P7, K1* to last 7 sts P4, K3
Row 7: K6, P3 *K5, P3* to last 6sts K6
Row 8: K3, P2, K2, P1, K2 *P3, K2, P1, K2* to last 5 sts P2, K3
Row 9: K4 *P2, K3, P2, K1* K3
Row 10: K5, P5 *K3, P5* to last 5 sts K5

Repeat rows 1-10 twice and then 1-3 again.

Knit 1 row.
Slip all stitches to a stitch holder or a piece of scrap yarn.  Cut yarn leaving at least a 4 foot length.
Now you have to wait an entire weekend to see what happens next!!
Happy knitting!

Thursday, January 24, 2013

Fragments Clue 7

Hey there Knitters!  Welcome to Clue 7 of our Fragments KAL

For this clue, we're going to dabble in cables!  For those of you who have knit cables before, please be patient with this post- there are lots of pictures!  For those of you who have not knit cables before, good news- there are lots of pictures (see what I did there :)! 

I really love cables.  I believe when it comes to knitting, cables give you the most for your money.  They really aren't that difficult (once you've broken the pieces down), have infinite possibilities (there are gazillions of ways to cross stitches), and create a highly texturized and visually intriguing fabric.  You really can't miss!

Now, if you don't have a cable needle, you can make do with a double point at or near the same size as the knitting needles you're using (it's kinda crazy how often I've done this, since most of my knitting supplies obviously have feet and love to go exploring through-out the house).   

Pattern Notes:  
C5- slip next 2 stitches to cable needle and hold to front of work.  Knit the next 3 stitches, then knit the 2 from the cable needle.

Photo Tutorial:
My photo tutorial shows the cable stitch exactly as you will knitting it for this pattern.  Please note however, that the swatch in the pictures is only a sample size and your knitting will look different.
Knit in pattern up to the C5 direction.
Slip 2 sts to cable needle...
...and hold the cable needle to the front of your work.
Knit 3 sts from left hand needle, then knit the 2 sts from the cable needle.
Continue in pattern for the remainder of the row.
All done!

Pattern:
Row 1: K3 *P2, K5* repeat across row K3
Row 2: K3 *P5, K2* repeat across row K3
Row 3: K3 *P2, C5, P2, K5, P2, C5* K3
Row 4: K3 *P5, K2* K3
Row 5: K3 *P2, K5* K3
Row 6: K3 *P5, K2* K3
Row 7: K3 *P2, K5, P2, C5, P2, K5* K3
Row 8: K3 *P5, K2* K3
Row 9: K3 *P2, K5* K3
Row 10: K3 *P5, K2* K3
Row 11: K3 *P2, K5* K3
Row 12: K3 *P5, K2* K3
Row 13: K3 *P2, C5, P2, K5, P2, C5* K3
Row 14: K3 *P5, K2* K3
Row 15: K3 *P2, K5* K3
Row 16: K3 *P5, K2* K3
Row 17: K3 *P2, K5* K3
Row 18: K3 *P5, K2* K3
Row 19: K3 *P2, K5, P2, C5, P2, K5* K3
Row 20: K3 *P5, K2* K3
Row 21: K3 *P2, K5* K3

Knit 3 rows.  During the third row, k2tog once near the center of the row in preparation for the next clue (47 sts).  

Good luck, and see you tomorrow!

Wednesday, January 23, 2013

Fragments Clue 6

Hi-ya Friends!  I've got a really quick and easy Clue for you today!  This pattern is only four rows long, so it should be a breeze to get through :)

Pattern Notes:
sl-1: Slip one stitch.

Row 1: Knit the entire row
Row 2: K3 *K1, sl-1* repeat across row K3
Row 3: Knit the entire row.
Row 4: K3 *sl-1, K1* repeat across row K3

Repeat these four rows for a total of seven times, and then repeat Row 1 again.

Knit 3 rows.

Happy knitting and see ya tomorrow!

Tuesday, January 22, 2013

Fragments Clue 5

Hi Friends!  How'd the big clue go? Hope your knitting is going well.  Here is Clue 5 for The Fragments KAL
 
Pattern Note: Notice the border is slightly larger than normal (4 sts instead of 3).  This is correct in order to keep the right number of stitches.  

Row 1: K4 *P5, K5* repeat across K4
Row 2: K4 *P4, K5, P1* repeat across K4
Row 3: K4 *K2, P5, K3* repeat across K4
Row 4: K4 *P2, K5, P3* repeat across K4
Row 5: K4 *K4, P5, K1* repeat across K4
Row 6: K4 *K5, P5* repeat across K4
Row 7: K4 *K4, P5, K1* repeat across K4
Row 8: K4 *P2, K5, P3* repeat across K4
Row 9: K4 *K2, P5, K3* repeat across K4
Row 10: K4 *P4, K5, P1* repeat across K4

Work rows 1-10 twice then work row 1 again (21 rows).

Knit 3 rows.

Monday, January 21, 2013

Fragments Clue 4

Hi-ya Knitters!  Did you have a nice weekend?  All caught up on the KAL?  I spent most of the weekend working on some other projects, but I'm looking forward to working on this week's clues!
So, here you go- Clue 4 for the Fragments KAL!  It's kinda a long one, but the good news is that there aren't any repeats.  If you are relatively new to knitting, take your time with this one and make sure to keep good track of where you are.

Row 1: K3 *P1, K2, P11* repeat to the last 3 sts K3
Row 2: K3 *K11, P2, K1* repeat to the last 3 sts K3
Row 3: K3 *P1, K2, P1, K10* repeat to the last 3 sts K3
Row 4: K3 *P10, K1, P2, K1* repeat to the last 3 sts K3
Row 5: K3 *P1, K2, P11* repeat to the last 3 sts K3
Row 6: K3 *K11, P2, K1* repeat to the last 3 sts K3
Row 7: K3 *P1, K2, P1, K3, P1, K2, P1, K3* repeat to the last 3 sts K3
Row 8: K3 * P3, K1, P2, K1, P3, K1, P2, K1* repeat to the last 3 sts K3
Row 9: K3 *P1, K2, P1, K3, P1, K2, P1, K3* repeat to the last 3 sts K3
Row 10: K3 *P3, K1, P2, K1, P3, K1, P2, K1* repeat to the last 3 sts K3
Row 11: K3 *P8, K2, P4 * repeat to the last 3 sts K3
Row 12: K3 *K4, P2, K8* repeat to the last 3 sts K3
Row 13: K3 *K7, P1, K2, P1, K3* repeat to the last 3 sts K3
Row 14: K3 *P3, K1, P2, K1, P7* repeat to the last 3 sts K3
Row 15: K3 *P8, K2, P4* repeat to the last 3 sts K3
Row 16: K3 *K4, P2, K8* repeat to the last 3 sts K3
Row 17: K3 *P1, K2, P1, K3, P1, K2, P1, K3* repeat to the last 3 sts K3
Row 18: K3 *P3, K1, P2, K1, P3, K1, P2, K1* repeat to the last 3 sts K3
Row 19: K3 *P1, K2, P1,K3, P1, K2, P1, K3* repeat to the last 3 sts K3
Row 20: K3 *P3, K1, P2, K1, P3, K1, P2, K1* repeat to the last 3 sts K3
Row 21: K3 *P1, K2, P11* K3

Knit 3 rows.

Enjoy your knitting and I'll see you tomorrow!

Friday, January 18, 2013

Fragments Clue 3

Hey everybody! How's it going so far?  Have you been able to cast on and get started? 
Well, we've made it through the first week (albeit a short one) of our Fragments Mystery KAL!  Later this afternoon I will get some pictures up of the first three clues so you'll be able to see what we've done so far.  In the mean time, here's the third clue for your project!

Row 1: K3 * K5, P1 * repeat from * to the last 3 stitches K3
Row 2: K3 *P1, K1, P4* repeat from * to the last 3 stitches K3
Row 3: K3 *K3, P1, K2* repeat from * to the last 3 stitches K3
Row 4: K3 * P3, K1, P2* repeat from * to the last 3 stitches K3
Row 5: K3 *K1, P1, K4* repeat from * to the last 3 stitches K3
Row 6: K3 *P5, K1* repeat from * to the last 3 stitches K3

Repeat rows 1-6 three times, then repeat rows 1-5.

Knit 3 rows.

Whenever you have questions, you can either post them in the comments section of this post or check out the Year of Swatches Group on Ravelry for help. 
Happy knitting and I'll see you on Monday!

Thursday, January 17, 2013

Fragments Clue 2

Hey there friends- I hope you've enjoyed the kick start to our KAL!  Did you find everything alright?  I'm curious to know what you'll be knitting with, so off to the right you'll find a poll about your yarn choice.  Please take a second and let me know what weight yarn you're using!
Are you ready for our next clue?  Its another fairly short one with plenty of repeat~  Here it is!

Rows 1, 2, 3, 4: K2 *P2, K2* repeat from * across to last two stitches K2
Rows 5, 6, 7, 8: K2 *K2, P2* repeat from * across to last two stitches K2

Repeat rows 1-8 for a total of two times, then knit rows 1-7 again (23 Rows total).

Knit 3 rows.

Care to see a picture of yesterday's clue?  On Fridays I will post pictures of the previous week's clues so you can see what we've done so far!

Happy Knitting, and I'll see you tomorrow!